How To Use Canva And PicMonkey To Make Awesome Visual Content
The popularity of social networking sites like Pinterest and Instagram have set the tone for what people want to see and share on the web.  Yet, the majority of posts shared on platforms like LinkedIn and Twitter are just links despite the fact that studies show that visual content – photos and videos – are by far your best bet at actually seeing engagement on the posts that you share.
But that notion really isn’t startling if you consider the types content you like to see on social media or even a website. You’re more likely to click on a post in a newsfeed or stay on a webpage longer if it has high impact images or auto play videos.
The dawn of visual marketing is upon us. And for businesses hoping to improve their engagement rates with their key audiences, an investment in visual content is no longer a “nice to have,” but a “can’t live without.”
For smaller businesses with limited resources, however, this can be a major challenge.
The going rate for even simple graphic design can be in the hundreds of dollars. Thankfully freelance websites like Fiverr and Upwork help out, but even that can add up over time, and you’re subject to turnaround times and limited revisions.
And while we suggest that you do work with a pro graphic designer on large projects, for social media posts and blog images, for example, we’ve got two free tools to share with you that will make creating visual content easy: Canva and PicMonkey, and they work very well together.
What is Canva?
Canva is an online graphic design platform that offers free access (yes, free) to design tools that you can use to create an amazing assortment of content. This freemium service also offers paid features, but the options available under the free account are more than adequate for most of your needs.

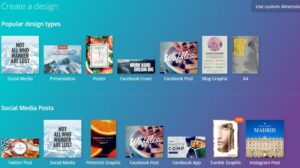
Signing up unlocks a treasure trove of design types and themes to use. And each template is preset with the ideal dimensions for that type of content.
Content types available range from social media covers and posts to PowerPoint presentations, blogs, email headers, and marketing materials like business cards, flyers, and posters.
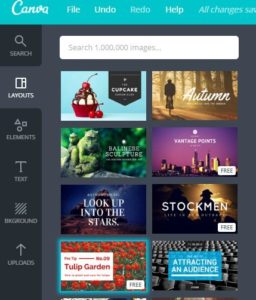
And creating a perfect design is easy with its drag and drop style editor. You simply select the design type you want to use and take advantage of the extensive gallery of free images (or upload your own) and layouts available to create the picture you want. 
While not all images are free (pricing starts at around a dollar for some premium images), this nominal fee is peanuts compared to paying hundreds, right?
Changes to your design are continuously saved. And once you’re done, you can save your image and download it in the format that works for you. You can even share it to social media directly from the platform.
So let’s say you create a blog image, like we did above. Once you download it, there’s one more thing you need to check before you use it. And that’s where PicMonkey comes in.
Pic Who?
Although the blog image you created in Canva looks amazing, it’s probably also amazingly big, especially with the text you added. Larger file sizes can cause issues, especially with website load times.
The fix is simple. Use PicMonkey, a free online photo editor, to reduce the size of your image without compromising its artistic value. You can’t alter your design, but you can make basic edits like cropping, to nip and tuck images down to a file size 100KB or less. Also available in PicMonkey are other editing features like textures, effects, and themes.
As with Canva, PicMonkey also offers premium features.
That’s it!
Your design is ready to use. Using Canva and PicMoneky together is an easy and, honestly, fun way to create one of a kind designs for your brand that don’t break the bank and don’t take much time to create.
So get in there and try it out. Let us know how it goes. Post one of your original designs to Facebook or Twitter using the hashtag #IDidThisCM!


